Template:Tenderloin Install Steps
Preparing your device & installation instructions
1. Create an ext3fs lvm partition of at least 1GB (use Tailor or Meta-Doctor to achieve this). It must be named ext3fs ! Tailor automatically uses this name for an ext3 partition.
2. Download the latest Moboot (0.3.8) with filename moboot_038-tenderloin.zip
3. Unpack moboot_038-tenderloin.zip and you will have a file called uImage.moboot_0.3.8
2. Download the image, copy it to the USB drive (/media/internal) and extract it into the new partition by issuing the following commands:
mount -o remount,rw /
mkdir /media/ext3fs && mount /dev/store/ext3fs /media/ext3fs
cd /media/internal
tar xzf webos-ports-dev-image-tenderloin.tar.gz -C /media/ext3fs
3. Download the kernel (luneos.uImage) and add it to the boot partition as uImage.LuneOS and either symlink it to uImage or use moboot. Follow the instruction below:
- Boot into webOS (make sure to have Developer Mode enabled!)
- Run novaterm
mount -o remount,rw /boot
cd /boot
rm uImage
exit
novacom put file://boot/uImage.LuneOS < luneos.uImage
novacom put file://boot/uImage < uImage.moboot_0.3.8
novaterm
cd /boot
ln -sf uImage-2.6.35-palm-tenderloin uImage.webOS
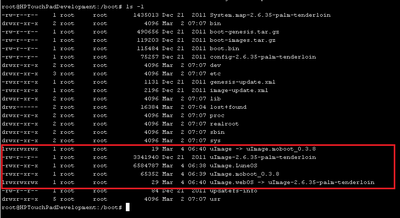
ls -l
Reinstalling the image
Sometimes it might be necessary to reinstall the image, in order to do so follow these steps:
mount -o remount,rw /
mkdir /media/ext3fs && mount /dev/store/ext3fs /media/ext3fs
rm -rf /media/ext3fs/*
cd /media/internal
tar xzf webos-ports-dev-image-tenderloin.tar.gz -C /media/ext3fs
